|


Open Scrippy and click on New.
Now insert a background. Browse for the background of your choice.
For this tutorial I used the original image to make a background. I
promoted it to layer, deleted the background layer and adjusted the slider to
about 50% transparency. I then used 20/20 to turn it into a tiled
background. You can use any background you'd like!
After you have chosen your background, do
a preview and make sure it looks ok.
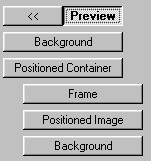
Next, Insert Container - Positioned
Container. Choose 0 from the left and 0 from the top and make it the same
as the largest contained image. Insert a frame and choose any color.
Insert Positioned Object - Positioned Image. Browse to find the finished
gif you made from the image already provided. Next, insert a
background. When you insert the positioned image and the background, make
sure that these items go UNDER the positioned container, as below. To make
sure they go below the Positioned Container, click on it before clicking on
insert.
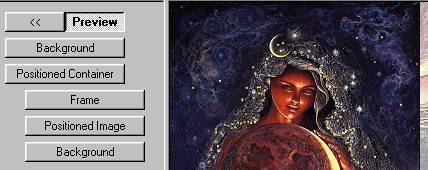
Browse for the golddust.jpg file that you
saved from the previous page. Make it scroll up-right and don't change any of
the other settings for now. Here is what you should now have.
Now an observant person will notice that
the frame has never shown up! That is because we told the container to
only be as large as the picture. If you want the frame to show around the
edges of this picture then you will need to enlarge the container by however
large your frame is. If you left it at 10, then by clicking on the
positioned image you can see it's dimensions of 250x336. Go back to the
Positioned Container and change it to be a specified size. The first
container is the width and since our image is 250 pixels wide, we want it to be
260 pixels wide. Now go down to the bottom and choose specified size and
make that one 346, since our image is 336 in height. This gives us 10
extra pixels across and down so that the frame now shows up! Take a peek
at it!
If you have followed all of these
instructions properly you should now see a sparkling image on your scrippy
master. If you do not see anything sparkling then go back and double check
what you have against what I have shown that you should have. Putting your
background ahead of your positioned image can cause it not to show up.
Someone is sure to ask, so yes, you could
have made this a border scroll however frames don't work well with scrolls of
this kind. Try it if you'd like. For simplicity I have instructed
you to place this image at the left top of your stationery, but you can place it
anywhere that you would like by changing the numbers in the container as in how
many pixels from the left and the top, etc, etc. You can also change the
scrolling direction and the speed of the scroll to your taste.
Next, add on a message area, a ticker and
a loading message. For instructions on doing those items, please refer to
the instructions for the Left Border Scroll.
Back to Page One of Sparkling
Backgrounds

|
Main Index
|
Tutorials Index
 |
This website and all content may be freely copied, reproduced or shared without
prior permission from the webmaster. All graphics represented here are
originals and all tutorials are provided by the webmaster.
Created by Ozmee, May 2001
|