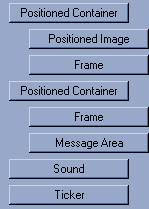
At this point you have now made the three windows that show up
on the left. We are going to insert the loading message next in order to
break up the positioned containers. This also gives you more of an idea of
where things are as it can get confusing and it doesn't really matter where you
put the loading message. You can also break up your positioned containers
using a ticker or the sound without any consequence. This can be a big
help!
11. Insert a loading message. By now most of you are
aware that within this area you can type whatever you want and as well can add
an image! Please keep in mind that people will get tired of waiting for
your email message if you make the timing very long here. I recommend no
more than 2 seconds and less if possible but definitely no less than 1.5.
However, during the creation of a Scrippy, I often set my loading message to as
little as 0 simply because when I want to view what has been done so long it
speeds up the process. But don't forget to change this before you save it
as a stationery :-)
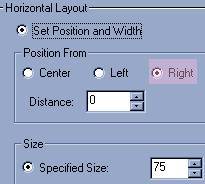
12-20. Now you will insert another positioned container, a
background and a frame. Do this three more times in all, using the small
background and the same frame settings as done in step number 4. The
settings for these are the exact same as for the first three frames with the
only difference being that instead of 'left' you will choose 'right'. View
the below image to see what is meant by that.
21. Okay, now that you have completed the previous three
additional containers with their backgrounds and frames, let's make sure that
you changed the scrolling directions! Each one should be the exact
opposite of the first three that were done. That should be up+right,
down+right and right for these last three containers. Now, be sure to
preview your stationery as you go along. This not only lets you know that
you are doing it right but gives you a little lift!
22. We will add another positioned container which is the
'holding area' for your main image. Insert a positioned container on it's
own level. The first image here shows what we have left yet to do in our
stationery.
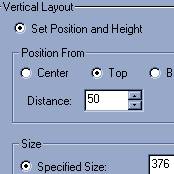
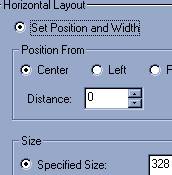
The reason behind these numbers is simple. The image
itself measures 318x366 and I inserted a frame of 2 pixels here as well.
Even though the frame is only 2 pixels wide, always allow more space for your
frame. If you don't care to have a frame here that is not going to be a
problem, just leave it out. In that event, your settings should be 10
pixels less in each area. If you are using a different image than the one
shown here then you will need to adjust the sizing of your positioned container
to match that of your own image. As well, if your image is a lot smaller
than the one here you should consider bringing it down so that it is more
centered in your pc. A setting of 50 might not be enough to center your
smaller image. Increase the distance from the top until your image looks
centered.
23. Insert a positioned container. This one will
hold our message area. Set the right and left margins to 110. Top
margin is 440 and the bottom margin is 30.
24. Insert a frame this time using pixel size of 4, the
same color as before and as usual it is in the style of inset. The inset
style makes it look more like a cutout.
25. Insert a message area. This message area goes
all the way to the left and doesn't go under a container. The message area
margins are 120 for the left and right, 450 for the top and 40 for the
bottom. This will be an expanding message area which will show up inside
of what appears to be a box.
26&27. The only thing left to do is to add some sound
and your own ticker. And...you're done!
I hope you enjoyed this tutorial and will enjoy using your new
stationery!