|

This Scrippy stationery is my own original creation and I hope that you enjoy
doing it too. Since the main feature of this stationery is windows that
appear as cut-outs, I felt the name windows was appropriate. Ok?
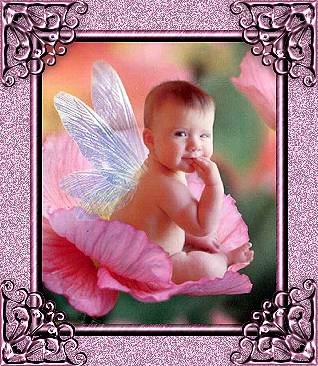
Click here to see the finished product that we are making. And click
here
to download the zip file with all of the necessary items which you will
need. If you do not want to download the zip file then you will need to
find your own backgrounds and images or you can use those shown here. Right
click on each image to save it to your own hard drive.
As
always, any of my images shown here are original creations and are available for
you should you wish to have them. The only image not original is the main
graphic used in the stationery. Ok? Let's get started!
Here are the images that I used for the stationery. You
can use these or make or find your own images, it doesn't matter in this
particular stationery. The only thing that might be of importance is the
size of the actual image used here.
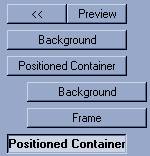
1. Open up Scrippy and insert a background. Use the
main background image. It is non-scrolling.
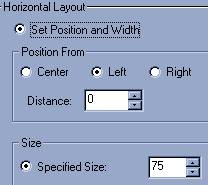
2. Insert a positioned container with these
settings: Left-0-75 and Top-30-400. These containers are the actual
windows in the stationery. If you do not care for the direction they are
set to scroll in this tutorial please feel free to change their direction.
But notice that each side is set to scroll opposite for conformity.
3. Insert a background under the positioned container and
use the smaller windows background graphic. This needs to scroll up+left
at 10 pixels.
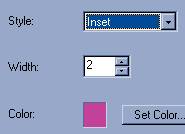
4. Insert a frame. Style inset, width of 2, color is
196-65-153.
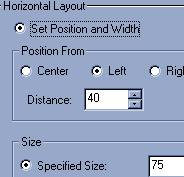
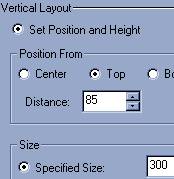
5. Insert another positioned container. This one
does NOT go under the first one but under the background itself. You
will be inserting more positioned containers and none of these will go under
another. Note the positioning of this container and see that it is even
with the first one and even with the background. Use the settings of Left-40-75
and Top-85-300.
6. Insert a background and use the small
background graphic. This should scroll down+left at 10 pixels per second.
7. Insert a frame
using the same color, style and size as in step number four. All frames
are treated with these same options.
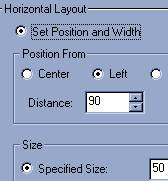
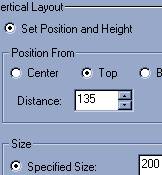
8. Insert a positioned container and use the settings as shown below.
Left-90-50 and Top-135-200.
9. Insert a background, use the small background and
have it scroll left at 10 pixels per second.
10. Insert another frame using the same method as step
#4.
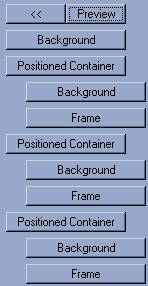
Does your master scrippy look like this?
If not, it won't work right. Fix it by moving it to the proper
position. That is accomplished by left clicking on the p.c. and simply
moving it left.
|