|

This page will contend with adding sound, a ticker and a loading message.

Insert - Sound
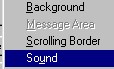
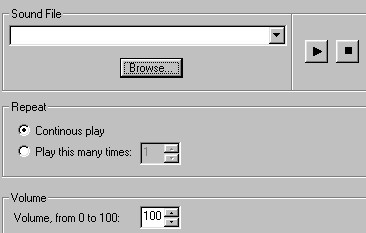
This box is seen when clicking on the sound addition on the
left. By clicking on browse you can now go and select the song you wish to
use. You can use mid or wav or anything that is normally used, but not an
asf. Those require special html coding for use in a Scrippy. Using
an asf is possible, if you have the code for it you can add it in using your
favorite text editor after you are finished with your Scrippy stationery.
You have the option of continuous play or only playing the sound file a certain
number of times, as well as volume control for your sound. I choose not to
change the volume from 100 as most people prefer to choose their own volume
setting on their personal computer. It is difficult to hear sound also, if
the author has lowered the volume. For midi I always choose
continuous. But, if I want to use a wav file I often choose only 1 or
2. Now, you may be curious as to whether or not you can have more than one
sound. Yes! You can have a wav and a midi file if you desire, try
these different sounds and view your stat to see how it all fits together.
Scrippy will give you a warning box however if you try to use more than one
sound. Disregard it if when viewing your stat it seems to work just
fine. When I mix a wav and a mid file, I choose the wav first and mostly
pick play once. When the wav file is done playing the midi file will
begin.
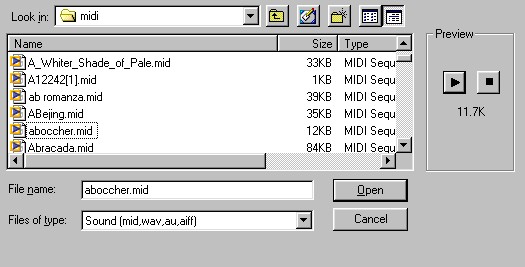
I chose the aboccher.mid for my sound. Notice the little
arrow on the right here, it allows you to play your midi, however it should
begin playing automatically after you darken it in. Clicking on open will
choose that midi for your stationery.
Adding a Ticker Message
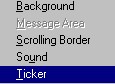
Insert ticker. When you click on ticker it should
automatically add it. Now another box opens up as below.
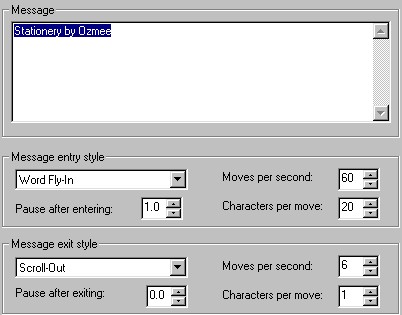
This is what you will see after you've added a ticker.
In the message box type in your text. You can have more than one row of
text and that usually works best. Message entry style offers several
combinations. I do not encourage you to use instant as it causes the
status box on the viewer's computer to flash and it may cause them to think
there is something wrong either with their system or your stat. Everything
you see here is user changeable. I generally use 60 moves per second in
order to speed up the appearance of my text and 20 characters per move. It
is not jerky at all. You can choose the method that your text leaves the
screen also. My advice is simply to try each of them until you find the
one which you like!
Adding a Loading Message

This area takes me a little bit of time because there are so
many possibilities. I think the first thing to consider is the background
color. If you are going to use an animation here and the animation's
background is not transparent and you don't want to fix it or don't know how to
fix it, then consider making the background color the same as your animations
background color. If you don't know what the codes for that are I suggest
you acquire a little program that helps you pick those colors. I use
Paintshop Pro to get the codes I need. Scrippy does not allow you to use
html codes at this juncture. Here is what it will look like.
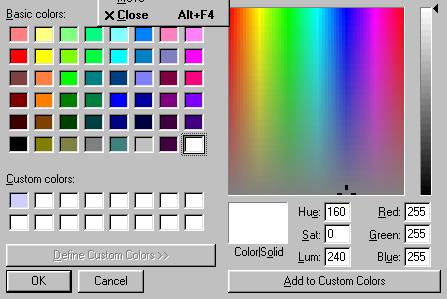
If you open up the animation in Paintshop Pro you can use the
color tool to click on the animation background and you can get the Red, Green
and Blue codes that way. Another way to do it might be to check the coding
before you go to send your stationery but that seems too hard to me. You
can try guessing of course.
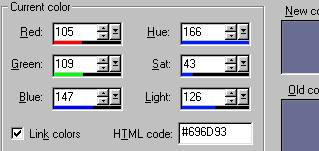
This is what you will see in Paintshop Pro. It gives you
the Red, Green and Blue codes that you can use in Scrippy to set your loading
message background whatever color that you want. This is so far the only
way I know to do it. Others may have a better answer though.
Now that you have established your background color, let's add
in an image or your animation.  Click on this little icon and it will allow you to browse to find your image or
animation file. You can center it, place it left or right, however you
prefer! I always use centered.
Click on this little icon and it will allow you to browse to find your image or
animation file. You can center it, place it left or right, however you
prefer! I always use centered.
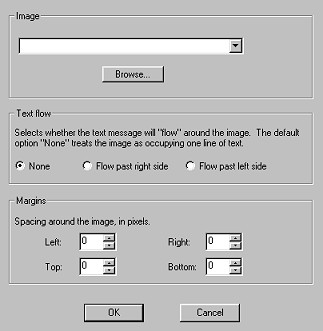
Click on browse to find your image to use in the loading
message. Here I recommend you use a graphic that is not large in kb's as
it will make your final stat much bigger and many people who use dial-up will be
bogged down by your stat and may become irritated. There is a text flow
option, this controls how the text you insert here is handled. Normally I
do not change these settings. I insert my text or image first, then do a
shift-enter so that the text or image which comes second is just one line
below. Here's mine!

You can change the font and font color of your loading message
in the same manner as you did in the message area. The last item to be
discussed in the loading message section is the timing. As you can see, I
have mine set on 2.0. However, if you are going to use an animation that
develops, such as a flower opening or something similar, you may need to
lengthen this number, making it higher makes it sit there longer while your
animation plays. For a non-animated loading message try using 1.0.
Keep in mind always that it often gets boring sitting there being forced to
stare at someone's loading message. The way I look at it is how would I
feel about it if I were the viewer?
I hope that this has helped you understand how to do a left
border scroll in Scrippy and that I have not left anything important out!
I do want to add in here that if you want to use a one-piece background, that
is, the image is already placed onto the background, then everything would be
done pretty much the same EXCEPT for the message area! You will find that
your message area has to be moved over to the right. The reason for this
is that Scrippy already knows on a two-piece background how wide your left
border scroll area is and so it acts like the right edge of that is the actual
background. But in a one-piece background it sees the actual left edge and
so you need to move your message area over. Check your previews often so
that you don't get an unpleasant surprise after you have done all of that work.
Saving The Stationery or
Webpage
Okay. Now you are all done
making your stat but how do you use it? Scrippy has a feature that will
put this stat in your C:\Program Files\Common Files\Microsoft Shared\Stationery
folder for you. However, if you intend to make more than one stationery
that you'd like to save and reuse more than once I do not recommend this.
If on the other hand, you only want to use that stationery until you make a new
one then you can do it that way. If you click on File-Export Email then
Scrippy will take the stationery that you have made and will stick in into your
Stationery folder in the directory shown above. If you make a second
stationery and do the same, the first one will disappear. This is because
Scrippy names stats saved this way as ScrippyEmail.html. There are several
ways you can get around this.
Method 1:
File-Save Web Page This method saves the html file to your
stationery folder but does not save the graphics to that
directory. If the graphics get moved then the stationery will not
operate properly. You could save all of the stationery graphics in
their own directory but may not delete them while the stat is being
used.
Method 2: Allow
Scrippy to export the stat as an email. Now open up Outlook
Express and choose the ScrippyEmail stationery. Once it opens up,
click on File - Save As. A box will open up and shows it an
extension of .eml. Give your stationery a name and choose where
you want your stationery saved. You could make a directory called
MyStationery and place it there. Outlook Express saves all of the
files associated with your stationery, the html, sound and graphics, as
one file. It will be mystat.eml and will be located wherever you
saved it at. Now when you want to use that particular stationery
to send an email with, all you need to do is go to that directory and
click on it. And those graphics can now safely be deleted if you desire
to or need to save space on your hard drive.

Left Border Scroll Page One
|
Main Index
|
Tutorials Index

|
This website
and all content may be freely copied, reproduced or shared without prior
permission from the webmaster. All graphics represented here are originals
and all tutorials are provided by the webmaster.
Created by Ozmee, May 2001
|