|
1. Start up a new Master Scrippy by clicking on File/New or the white
paper icon.
2. Insert a frame. Style groove, size 5 and color
0-128-0. 
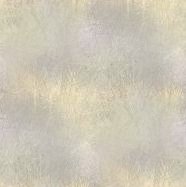
3. Now insert a background and use the graphic called scenic-bg2.jpg.
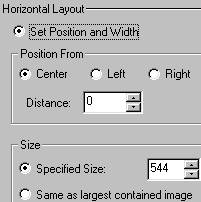
4. Insert a positioned container. Horizontal is
centered at 0 with a specified size of 544. Vertical Layout is 24 pixels
from the top with a specified size of 409.
5. Insert a positioned image and use the image called
scenic1-frame.gif. This as you see, is merely a frame with a transparent
middle section, sized down here to save space.

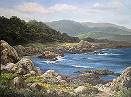
6. Now insert another positioned image and this time
choose the one that is called scenic1-sm.jpg. This is the main
image. You can see that this image is 20 pixels smaller than the frame
above when you look at the sizes of each. You might think why not just
make the frame part of the image right? Well you can do that, but there
is a reason for not doing it here. The birds and the boat will move out
of the picture, if the frame is part of the main image these moving objects
will get on front of them. We want them to go behind the frame
instead. The first image shows a cut-down version of the main image you
are using. The second image depicts the moving object going behind the
frame.
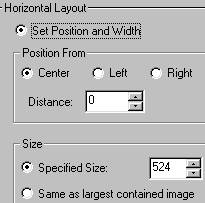
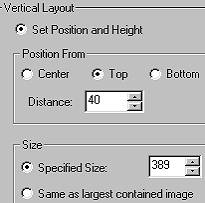
7. Now we are going to insert another
positioned container which will hold the moving objects. This container
goes all the way over at the left margin just like the first one did.
Horizontal is centered at 0 with a specified size of 524. Vertical
layout is 40 pixels from the top with a specified size of 389. If you
look at your positioned main image you might notice that this is the exact
size of your main image. This way when you go to use your own image you
will know what size to make it.
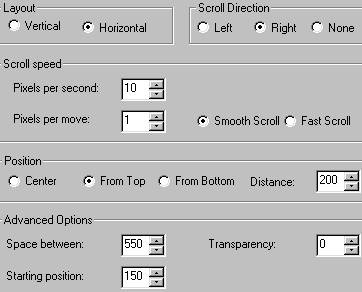
8. Now we are going to insert four positioned
scrolls. Go ahead and insert them now please. For the first one we
will use the graphic called clouds21.gif. For the second one we will use
a graphic named clouds1.gif. For the third one we will use the graphic
called 3seagulls.gif and for the fourth one we will use the graphic
sailboat1.gif.
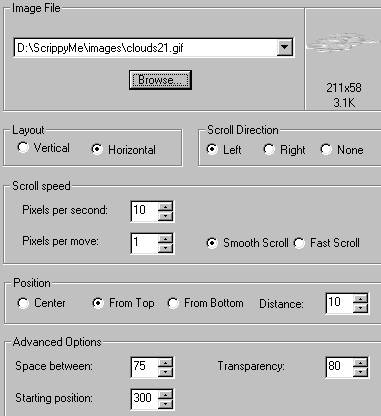
Positioned Scroll #1
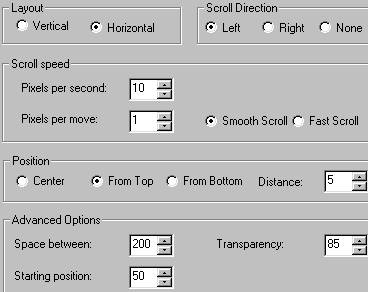
Positioned Scroll #2 (Clouds1.gif)
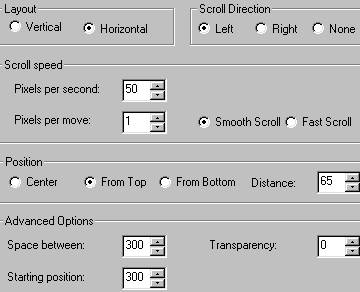
Positioned Scroll #3 (3seagulls.gif)
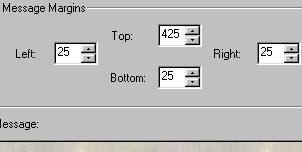
9. Add in a message area and use the settings as shown
below.
10. Add in another frame. This goes all the way
over to the left margin. Make this one a double with a size of 10 and
check on 'place over background'. The color is 0-64-0. 
11. All that is left now is to add a ticker, the sound
and a loading message. If you need help with these three items, please
go back to lesson #1 for detailed instructions.
That's it! You should now have a nice 'moving picture
image'. Hope you enjoyed it and that it was easy enough for everyone!
|
Main Index
 |
Tutorials
Index
 |
This
website and all content may be freely copied, reproduced or shared without
prior permission from the webmaster. All tutorial graphics represented
here are originals and all tutorials are provided by the webmaster.
Created by Ozmee,
December 2001
|