|

This is
lesson three for the ScrippyMe
Users. Click here
to download the zip file with all of the graphics and sound file. Click here
to see the end result. The images used for this example were chosen at
random and are not intended for your use in a stationery. Feel free to
choose your own images but for lesson purposes, please resize the main image to
be the same as the one that comes in the zip file. You can use these if
you want though.
1.
Start up a new Scrippy and insert
a background using
the lesson3-bg1.jpg.
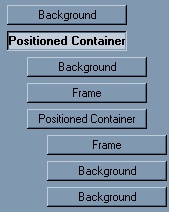
2.
Insert a positioned
container. The
settings for horizontal are center, -225, specified size of 100. For
vertical the settings are 'top', 75 and size of 300.
3.
Next insert a background using the
graphic lesson3-bg2.jpg. Set the transparency to 50%.
4.
Next you need a frame, inset, 2 pixels and use this color. #E1B493
5. Insert
another positioned container and this one does go under the first one. Set
all of the margins to 10.
6.
Put in another frame as before, size 2, inset and use the color #E1B493
7.
Now insert two backgrounds. For the first one, use lesson3-bg3.jpg
For the second one use white.jpg with a transparency of 70 and scroll it up and
left. This background goes at the bottom.
8.
Click on the very first positioned container and go to edit/copy. Then
paste this container and move it underneath the last background of the first one
and over to the left. That way, it does not reside 'under' the first one
but is it's own boss. A few settings need to be changed for this
section. This one is 225 and not -225. That puts it to the right of
center. The minus makes it go to the left of center. In the last
background, which is the white.jpg, scroll this up and right instead of up and
left. Now you have two sets as shown above.
9.
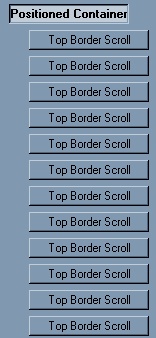
We need to insert another positioned container next. It is a boss
container and sets over to the left edge. Horizontal is set to center,
distance of 0 and size of 287. Vertical is set to 'top', distance of 50
and size of 338.
10.
Under this container insert a top border scroll. Use the image
lesson3-main.jpg. Set pixels per second and pixels per move to 287.
Check overlap with next object. In space between put 3157.
Explanation:
There are going to be 12 containers, thus 11 x 287 (width of image).
Whenever you do this kind of thing you will want to subtract one from the number
of scrolls that you have.
11.
Next, edit/copy and then paste 11 more of these containers under the positioned
container right where the last one was put. To do that, just click on that
positioned container and go to edit/paste until you have a total of 12 top
border scrolls. The settings for these are as shown below. The only
changes in these are going to be the starting position and the
transparency. So for simplicity's sake, s=starting
position and t=transparency.
Make sure that all of these top border scrolls go the same way. As you are
copying and pasting, this should not be a problem. If you are doing it
manually, doublecheck that they are all going either right or left.
| One |
S=0 |
T=90 |
Seven |
S=1722 |
T=15 |
| Two |
S=287 |
T=75 |
Eight |
S=2009 |
T=30 |
| Three |
S=574 |
T=60 |
Nine |
S=2296 |
T=45 |
| Four |
S=861 |
T=45 |
Ten |
S=2583 |
T=60 |
| Five |
S=1148 |
T=30 |
Eleven |
S=2870 |
T=75 |
| Six |
S=1435 |
T=15 |
Twelve |
S=3157 |
T=90 |
12. Now insert another positioned container making sure
that it is a boss container over to the left and not under any other
container. Set this to center, distance of 0 and size of 225 for
horizontal. For vertical the settings are top, distance of 85 and size of
269. This container will hold our two backgrounds of snow. If you
choose later not to do the snow then you can always delete this section.
13. Now insert two backgrounds under that container.
Choose the graphic snow2.gif and scroll one down and one down and right.
14. Insert a frame, this goes all the way over at the
left, not under a container. It is a double frame of 15 pixels, check place over
background and the color to use is #5195A6
15. Now we will put in the frame that doesn't fade.
So for that we need another positioned container. Horizontal is center, 0,
same as largest contained image. Vertical is 50, 0 and same as largest
contained image. Under this put in a positioned image, the graphic is
called lesson3-frame.jpg. Set this to center and from the top. This
grouping is a boss grouping, goes by itself over at the left.
16. We're almost done! Insert a message area by
itself, top margin is 375, left and right margins are 130 and the bottom margin
is set to 10. Type some text in there and center it. The color used
is #3E717D and although I use Comic Sans MS, you can choose whatever font you
prefer. Click on the scrollbar colors and put this color in for the
default base color, #5195A6
17. Now insert some sound, the music provided is called
RomeoJuliet(1).mid. Set it to play indefinitely.
18. All that is left is to insert a ticker and a loading
message. Make sure to add at least the loading message because if you
don't, Scrippy will, and it will be plain white with default text. Keep
your timing to 1.5, no more than 2.0 if you are using an animation.
Tutorial Index - Main
Index
This website and all content may be freely copied, reproduced or shared without
prior permission from the webmaster. All graphics represented here are
originals (other than lesson pictures) and all tutorials are provided by the webmaster.
ScrippyMe created by Ozmee, 2002
All content ©Ozmee 2001, 2002
*Thanks Anita for noticing
the error on this page!
|