|
Expanding Message Area Many members seem to be having trouble understanding the message areas within a Scrippy stationery. For that reason I am providing this lesson and I hope that it will help everyone understand how to do them.
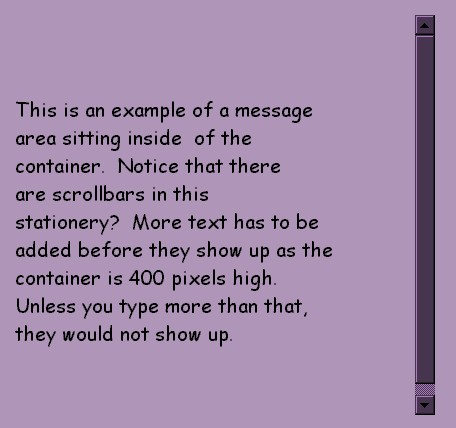
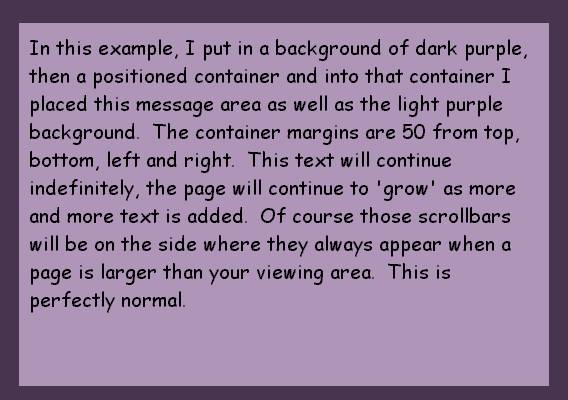
The example above shows what happens when you put your message area inside of a positioned container. For many stationeries, this is not necessary. If you make a stationery with only a positioned image, for instance, no container is needed. Left Border, Right Border, Top and Bottom border scrolls also do not need a container for the message area. For these types of stationeries all one needs to do is decide on their margin width, distance from the top, making sure it falls below your main image, and distance from the bottom. It can be as wide or as narrow as you wish. The text automatically expands as you type. But when you put your message area inside the container as shown above on the right, you will ALWAYS get a scrollbar, unless you do not put in very much text. Not only that, but if you put the message area inside of the same container as your main image, the text will scroll up on TOP of your image!
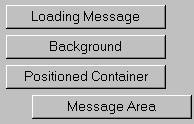
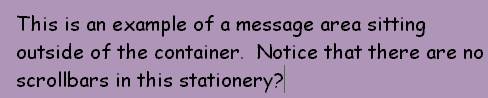
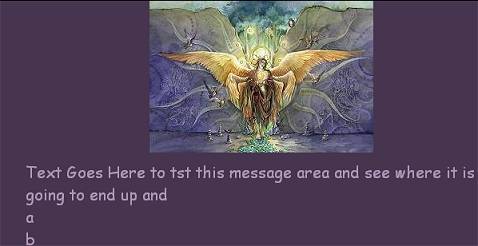
In this example shown, there are no scrollbars because the message area is sitting underneath the positioned container. See, it is 'under and to the left' of where it probably got put in at. If you click on the loading message and then click on insert message area, the message will be placed just underneath the loading message. You can grab it with your mouse, left click on message area, move it anywhere you like and leave it there by releasing the left mouse key. If you had your positioned container chosen when you went to insert the message area then your message area would be placed underneath and inside of the positioned container as shown in the second image on this page! Again, it is a simple matter to move the message area down and to the left so that it sits all by itself.
Now, let's confuse you a little. This message area IS inside of a container! I do this only to show you that it can work. But this stationery has only the one container which is expressly for this message area. When you type longer than the viewing area is large, scrollbars appear over on the right just like they do in any stationery. Left and right margins here are set to 130, I know it states 50 in the image but I changed it to 130 to save space.
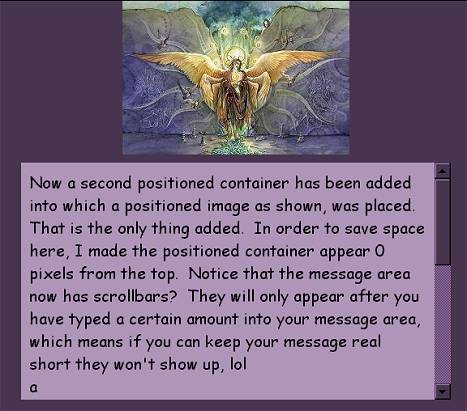
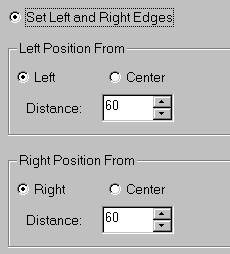
This example now shows that a second positioned container was added. Into that I placed a positioned image. This container was placed at 60 pixels from all margins except for the top, where I placed it at 0 in order to save space. Once you type enough, the scrollbars will appear but not on the side where they did before, but on the side of the message area itself.
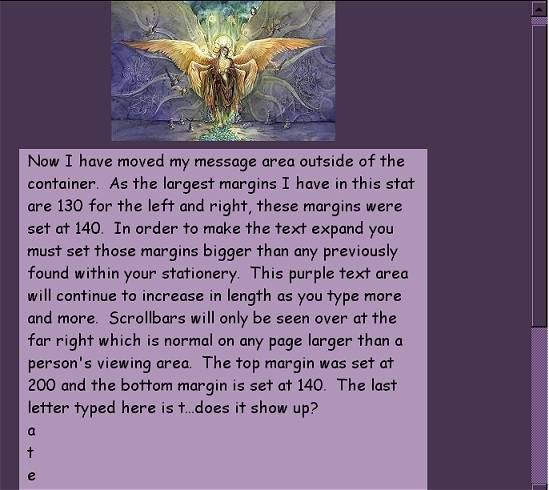
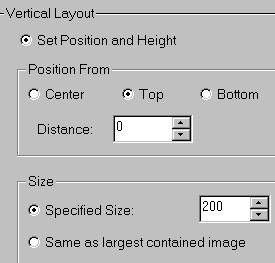
The answer is no you can't see the T because in doing a snapshot it got cut off, lol. But you could on viewing. This message area will not ever have a scrollbar but you see it over on the right? That is the same scrollbar you would see if you went to some web page and had to scroll down. The one that concerns us is the one which shows up in the message area. Notice there isn't one? Now look at how the scrippy was made over on the right. All I did was take the message area out of the container and put it to the left underneath. The biggest container margins I had were 130. The left, right and bottom margin was set to 130. So all I had to do was set the margins for the message area bigger than that to make this an expanding message area. I set the top of my message area at 200 because the image is 190 in height. You can see there is only 10 pixels separating the image from the message area as I put the image at 0 from the top. I set the left and right message area margins at 140 but I could have used 135 if I wanted to cram my text over at the edges. I like a little space, 10 pixels is the least I use for any side margin and only because I hate wasting space. Does this explain clearly enough how to do your own expanding message area? Probably not, lol In some stationery the biggest margins may not be readily apparent. In that case you can add up the margins of the containers to see what number you need to use.
This is a different situation shown above. The horizontal margins were set from the left and right but the vertical was sized. Even though that is the case, the expanding message area will still work. The left and right message margins in this case were set to 90 (my effort to save room on this page)...they only needed to be set above 60 in order for the message area to become expandable. You can set horizontal and vertical as shown in the last image above and the message area will still expand as long as it is NOT inside of that container. Message areas inside of containers expand also but then you have a scrollbar. In some instances, you might need a scrollbar. In the lesson called Dream, the text area was set to the side. I could have made the text area there expand however then the main image would scroll up and out of sight during reading if it were a long message. So I chose to use a scrollbar. In the palms lesson it is the same. You can have an expanding message area but the images would disappear. There is a way to make the main images move down as the message moves down. The way to do this is NOT to choose 'from the top' in the vertical layout. However, I do not personally prefer that method so I do not use it. This is all I can think of at the moment for explanations of how to do expanding message areas. If anything new appears I will add it to this page. It would be beneficial if you would try each one of these methods for yourself so that you can get a good grasp of how these ways all work. Please be sure to let me know if you did not understand something here so I can think of another way to explain it for you so that it will be easier to understand. But I have included plenty of graphics here in an attempt to make it easier, as some people need pictures to fully be able to understand how these message areas work. If you feel that you need more images, please feel free to let me know that also. ©Ozmee
2002 |