|

Lesson20.
Please save this stationery as lesson20 and when submitting to the group, use
that for the name. That way I am able to assist you easier if there are
any problems. Thanks!
Welcome to
the crossover tutorial. As stated on the preview, this ssc file came from
our own Nona and she gave me permission to use it for a tutorial for
everyone. To preview the finished tutorial, please click here.
To download the zipped file with all of the graphics, sound and the ssc file,
please click here.
1. Open up a new master scrippy file and insert a
background. For this one you need to use the crossover-bg2.jpg.
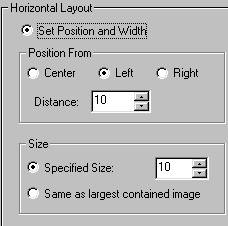
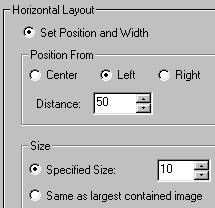
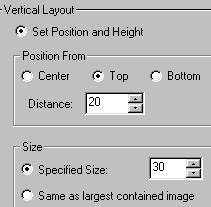
2. Insert a positioned container. As this is the
first positioned container it will show up all the way over at the left
margin.
3. Insert a frame.

4. Insert a background.
5. Now click on the main background and insert another
positioned container.
6. Insert a frame just as you did in step #3.
7. Insert a background just as you did in step #4.
8. Click on the main background and then insert a
positioned container.
9. Next insert a frame, just as you did in step #3.
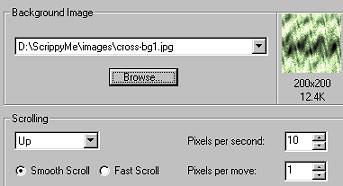
10. Insert a background. Use cross-bg1.jpg and
scroll this one left. Everything else is the same as in #4.


This is what you should have at this point.
11. Click on the main background and insert a positioned
container.
12. Insert a frame as you did in step #3.
13. Insert the same background and scroll direction as in
step #10.
14. Click on the main background and insert a positioned
container again.
15. Insert a frame as in step #3.
16. Insert a background as in step #13. BUT, scroll
this one DOWN.
17. Click on the main background and insert another
positioned container.

18. Insert another frame as in step #3.
19. Insert another background using the cross-bg1.jpg and
scroll this one RIGHT. Please refer to step #13 for an image.
20. Click on the main background and insert another
positioned container.
21. Insert a frame as in step #3.
22. Insert a background using the cross-bg1.jpg
image. Scroll this one UP.
23. Click on the main background and insert one more
positioned container. This is the last positioned container you will
insert!
24. Insert another frame as in step #3.
25. Insert another background as before. Use the
cross-bg1.jpg and scroll this one UP! Refer to step #10 for the image but
make sure to scroll it up.
This makes a total of eight positioned containers, each one
should be all the way over at the left margin.
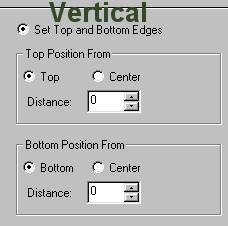
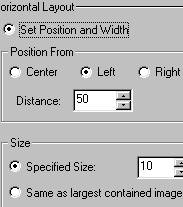
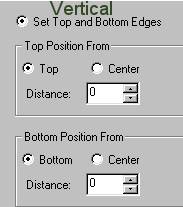
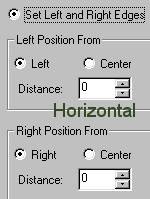
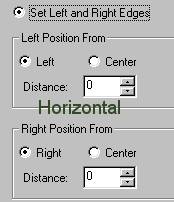
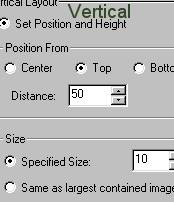
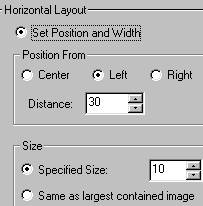
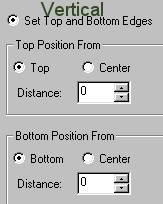
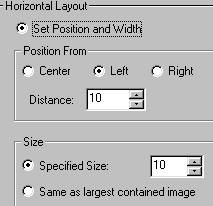
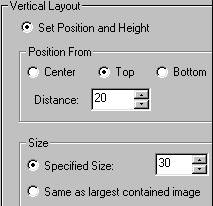
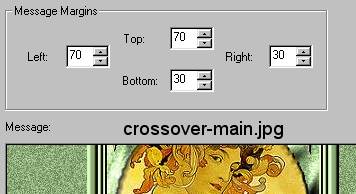
26. Next we will insert the message area. Set all of
the margins as shown in the image below. When that is done you will click
on this icon  and
insert the image named crossover-main.jpg. While that box is open, notice
it gives you the option to set margins around the image. Set these all to
10. If you have already clicked and missed that option box, click on the
main image and delete it then go and redo it. and
insert the image named crossover-main.jpg. While that box is open, notice
it gives you the option to set margins around the image. Set these all to
10. If you have already clicked and missed that option box, click on the
main image and delete it then go and redo it.
27. All that is left to do is to insert sound, a ticker
and the loading message. Try to keep your loading message time down below
2.0. To learn how to add in a background graphic in your loading message,
please go to the main index and refer to the Scrippy Tips section.
CONGRATULATIONS! YOU'RE DONE!
I hope that you have enjoyed doing this tutorial and
that all parts were easy to understand, with plenty of images.
As always, tutorials made by Ozmee are free to
save, pass around and share with others. Tutorial created 11/11/2001 by
Ozmee.
|