|
 
To view the completed stationery, please click here. To
download the zip file with ssc, graphics and sounds, please click here.
This file is 131kb.
1. Insert a background using ghost-bg1.
Non-scrolling.
2. Insert a frame with a width of 10 pixels, color of
black and check the little box where it says place over background.
3. Insert a positioned container and set all of the edges
at 15 pixels. (Set right, left, top and bottom which are on the right side
of the master scrippy.
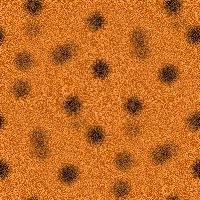
4. Insert a background and use the shiny-orangebg.jpg.
Non-scrolling.
5. Insert another frame of 10 pixels and make it
black. This time do NOT check place over the background.
Non-scrolling here also.
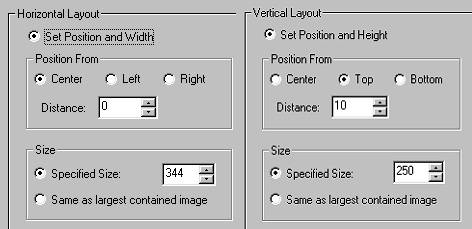
6. Click
on insert - positioned container. Once again, set the right, left, top and
bottom edges all to 30. This does not go under the previous container.
7. Insert a frame of 3 pixels, inset and use the default
color.
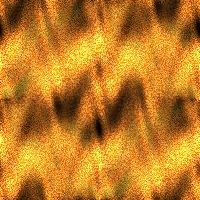
8. Now insert another background and use the one named
ghost-bg3.jpg.
9. Insert
another positioned container. Set right, left, top and bottom edges all to
40. This does not go under the previous container.
10. Insert an inset frame of 3 pixels using the default
color.
11. Insert another background and use the
ghost-bg2.jpg. Non-scrolling.
12. Now insert another positioned container. Set the left
and right edges at 50 pixels. Set the top at 275 pixels and set the bottom
at 50 pixels.
13. Next insert a frame of 10 pixels, double and use the
color 255-128-0 or #FF8000. Do not click on place over the background.
14. Next we will insert a background called white.jpg.
This is our foggy background. We want it to scroll up and right.
Click on fast scroll and change the pixels per second to 30. Down at the
bottom right, change the transparency to 70.

15. Insert a message area next. This goes all the
way over to the left margin! The left and right margins should be set to
90. The top margin should be 285 and the bottom margin should be 60.
16. This next part is our scrolling ghosts. Insert a
positioned container and make sure that it is set all the way over at the left
margin. To do this easily, click first on background and then click on
insert/container/positioned container. It will automatically be put over
at the left side. As always, if you put it in the wrong place you can
easily drag it over. However, lately I have been finding that there are
times when your container won't come out from under another one. If this
happens to you, just delete that one and go click on background first and then
insert it. Make it a specified size of 344 for horizontal, centered and 0
distance. For vertical set it from the top at 10 pixels and make it a
specified size of 250.
17. Under the previous container insert another positioned
container. For horizontal, set position and width, center, -86 distance
and same as largest container. For the vertical set the top at 20 and a
specified size of 250. If you remember, for kaleidoscopes, we normally use
the exact height of the image but not this time.
18. Next under that container insert a positioned
scroll. Set this horizontal, right, pixels per second 80, pixels
per move at 1, and fast scroll. For the bottom portion, the position is
centered which is the default and 0 which is also the default. Space
between 344 (double the width) and starting position is -172 (equal to the
width). Set the transparency at 40. Use the graphic dc-ghost-small.gif
for both of these positioned scrolls.

19. Insert another positioned scroll. Set the
horizontal, left, 80, 1, fast scroll, the vertical space between 344,
starting position -172 and set the transparency to 40.
20. Now click on that positioned container that you put in
right under the message area. Insert another positioned container.
This should be at the bottom now. Set position and width; center 86, size
250. For vertical set it from the top 20 pixels and size of 250.
21. Insert a positioned scroll. Set the horizontal; left,
pixels per second at 80, pixels per move at 1 and fast scroll. Space
between is 344 and starting position is 172. Transparency is 40.
22. Insert a second positioned scroll. Horizontal, right,
80, 1 and fast scroll. Space between is 344 and starting position is
172. Transparency is 40.
23. Check your stationery now by previewing it and make
sure that your ghosts are scrolling as they should be.
24. Insert a positioned image. This should be all
the way over at the left margin. We will use the image ghosts-dc-small.gif.
Make this image 10 from the left and 10 from the top.

25. Next insert another positioned image. This time
you will use the graphic ghosts-dc-small-right.gif. Set this one
from the right 10 pixels and from the top 10 pixels.

26. We will insert our first sound. Choose the sound
called 7thGuest.mid and set it to continuous play.
27. Next insert a loading message and set it to run for
1.5 seconds. If you wish to use the bats that I put in mine then I used
bat3, bat6 and bat4. Browse to those three animations and insert
them. Set the background color to #FF8000. Now enter and browse to
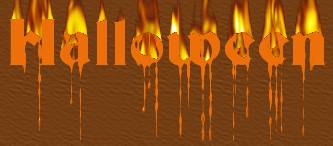
find the graphic called halloweentitle.jpg.
28. Insert a second sound. This will cause Scrippy
to pop open a warning message. Ignore it and say ok. Now browse to
find the wav file named evillaf.wav.
29. Insert a ticker and put in a message, if you
want! You may have your default set to say the same thing, like I do.
PS. I had to add this here after I viewed the
example stationery. For best effects when you do your own script like this
make your main images mirror
images. That way when it meets in the middle it will look a lot better.
That's it! Now you should
have a cute little Halloween stationery to send to all of your friends. I
hope that all of these instructions were plain and easy to follow, but if not
please feel free to contact me.
This website and all content may be freely copied, reproduced or shared without
prior permission from the webmaster. All graphics represented here are
originals created by me except for the little animations. I have no idea
who made those. This tutorial was updated on 1/29/2002.
Created by Ozmee, October 2001
|
