|


This lesson
will show you how to insert a background into the loading message of
a Scrippy-2 stationery. Although this is one of the tips on the
Scrippy tips page, I've had requests for a tutorial for this
procedure.
Alright,
let's get started. Here's where you are. You have just
completed a stationery and now you would like to have a background
in the loading message. That is easy! First however you
need to decide if you want your message to match the
background. If you'd like just to put in some text or an
animation, make sure the animation has a transparent background or
else it might not look as well. Make sure whatever text color
you have chosen will show up well against your background.
Sometimes it is necessary to increase the size of your loading
message from the normal 12 to perhaps 14 or 18 in order for it to
show well against your background graphic. Now, are you
ready?
Once you have completed your stationery, save it as
usual, as an html or htm file. Now using your text editor such
as notepad or metapad open up the html file. In notepad it
might not show you the html file. Change the bottom box to 'All
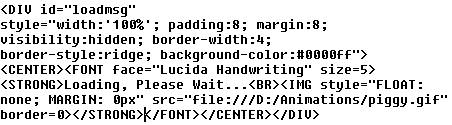
Files' so that the html file will show up. Now select the file
and open it up as large as it will go for better viewing. The
first thing you will do is find the selection as shown above.
Yours will be wider and more together, this one I have sized down
for viewing here, although this is a complete loading message code
out of a stat that I have previously done.
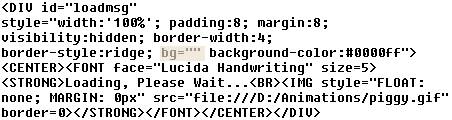
Right in front of where it says background-color: I
want you to insert code as shown above. This is bg="".
Now you will insert the complete path and file name of your intended
background graphic in between the " and ". As below.

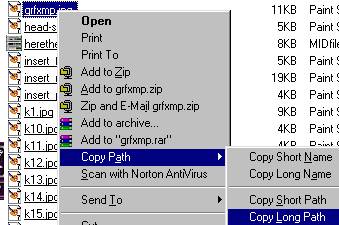
At this point, I recommend that you obtain a copy of a
neat little program called Path
Copy. This program allows you to copy the entire path
of any file which makes this one step very easy. Here's a
screen shot of it. If this link doesn't work just do a search
for it.
Okay. Now if you were to preview your stat you
wouldn't see any change in it at all. That is because we need
to add one more line of code before it will work.
Right after the </head> statement we will add
the following code:

Of course the path and file name will be different for
your background image. You will add the portion <body
background=""> and insert your path and image name in between the
" and the ". Now save this, just click on file/save as you
have already saved it as a html file. Do a preview on the
stationery now to see the final results!
I hope that this tutorial was of some
assistance! As always, please feel free to contact me for any
additional help!
 
This website
and all content may be freely copied, reproduced or shared without
prior permission from the webmaster. All graphics represented
here are originals (other than lesson pictures) and all tutorials
are provided by the webmaster.
Created by Ozmee,
August 2001
|