|
Four Way Kaleidoscope

To preview the results of this tutorial, please click
here. To download the zipped file with all components, please click here.
1. Open up Scrippy and click on new.
2. Insert a background. Use the graphic
brown4.jpg. This is not supposed to scroll. But at the bottom where
it says transparency 0, change this to a 1.
3. Insert a positioned container.
4. Insert under the previous container, another one.
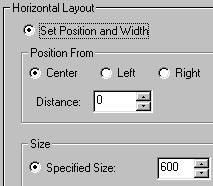
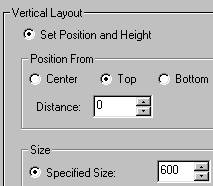
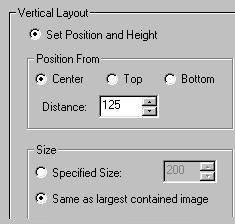
5. Under the second positioned container, insert a
positioned scroll as shown. The graphic to be used is design4.gif.
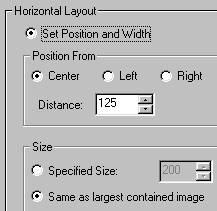
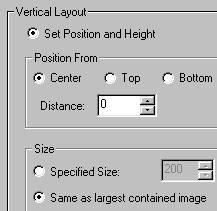
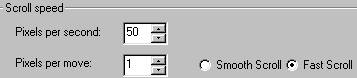
Settings are as follows: under layout choose vertical, scroll direction is
up. Pixels per second is 50 and per move is 1. Check Fast
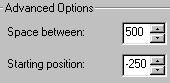
Scroll. Position is centered. Space between is 500 and starting
position is 250.

6. Insert another positioned scroll. Everything is
the same as in #5 except that the scroll direction should be set to down instead
of up.
7. Click on the 'first' positioned container and insert
another one.
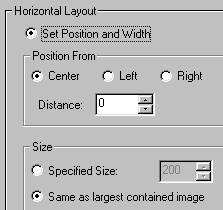
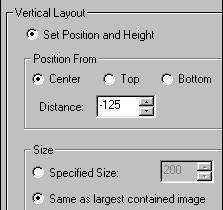
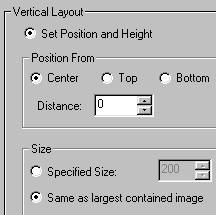
8. Next insert two more
positioned scrolls under the newest positioned container. The graphic to
be used will always be design4.gif. Settings are as follows. For the
first positioned scroll: Vertical - down - 50 pixels - 1 pixel and fast
scroll checked. Position centered. Space between is 500 and starting
position is MINUS 250. The second scroll is exactly the same except the
scroll position is UP.
9. Click on the first positioned
container again and insert another positioned container. The settings are
as follows:
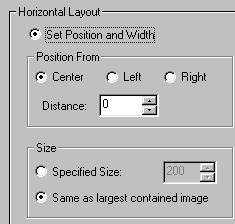
10. Insert two positioned
scrolls under this last container. Settings for the first one is as
follows: horizontal - left - pixels per second 50 - pixels per move 1 -
fast scroll - position=center, space between is 500 and starting position is
250. Settings for the second scroll are the exact same except this one
scrolls from the right.
11. Click again on the first
positioned container and insert another one. The settings are as follows:
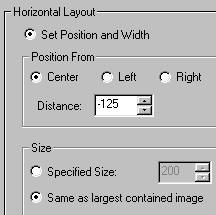
12. Under this last
container, insert two more positioned scrolls. The settings are as follows
for the first one: Horizontal, Scroll Direction=Right, 50 pixels per
second and 1 pixel per move, fast scroll. Position is centered.
Space between is 500 and starting position is MINUS 250. For the second
positioned scroll everything remains the same but make this one scroll from the
LEFT.


13.
Now click again on the very first positioned container and insert three more
positioned containers. Under each one of these insert a frame. Each
positioned container is centered. The first one needs a size of 540 for
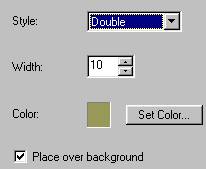
both horizontal and vertical, the second 520 and the third 500. Make frame
#1 a double, size 10 and check place over background. The color is
152-152-88. For frame #2 make it solid, 1 pixel wide and use the same
color as before. For frame #3, set it to be 6 pixels wide, style of double
and check place over background. Use the same color for all three frames.
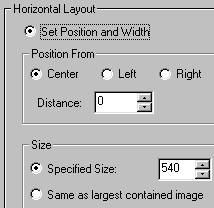 
14. Next we will insert the
message area. The margins are as follows: Top 640, left and right
are 100 each and the bottom is set at 20.
15. Insert a sound. You
can use the one provided or one of your choosing.
16. Insert a loading
message. Type in text you want or insert a graphic.
17. The last thing to do is
to insert a ticker.
CONGRATULATIONS!
YOU'RE DONE! I hope you have enjoyed this tutorial and that
your stationery looks great! After you have done this one, why not find
two images and make your own! Make each image a gif with a transparent
background and mirror it for left and right. Have fun with it! INDEX
- TUTORIALS All
graphics for the kaleidoscope are the intellectual property of their
owners. The graphics used for this tutorial (backgrounds) are free for use
without prior approval. This tutorial created by Ozmee, November 25, 2001.
|
